Showing posts with label DIY. Show all posts

Tuesday, 28 May 2013

Cupcake case table decoration.

We've been very excited to share this DIY post with you all. Would you believe that this is made using cupcake cases! The outcome is pretty splendid, the perfect vintage look. 
Everything you need to make this beautiful table decoration is cheap and easy to find! 
So let's get started!

What you will need:
Cupcake cases. Any colour is fine!
Candlestick holders. We got ours at a car boot sale, an absolute bargain!
Pearl headed pins. You can find these in most craft shops or online (We got ours from good ol' Ebay.)
Polystyrene ball. Also available in most craft shops! You can use any size you want, we used a 10cm ball.
Glue gun.


To start off, take your first cupcake case and poke a pin through the centre. Gather the case together as we have done in the picture below. 


 Take your glue gun and glue the bottom of the cupcake case, just under where the pin pokes out. Stick the pin into the polystyrene ball (careful not to glue your fingers in there with it!).
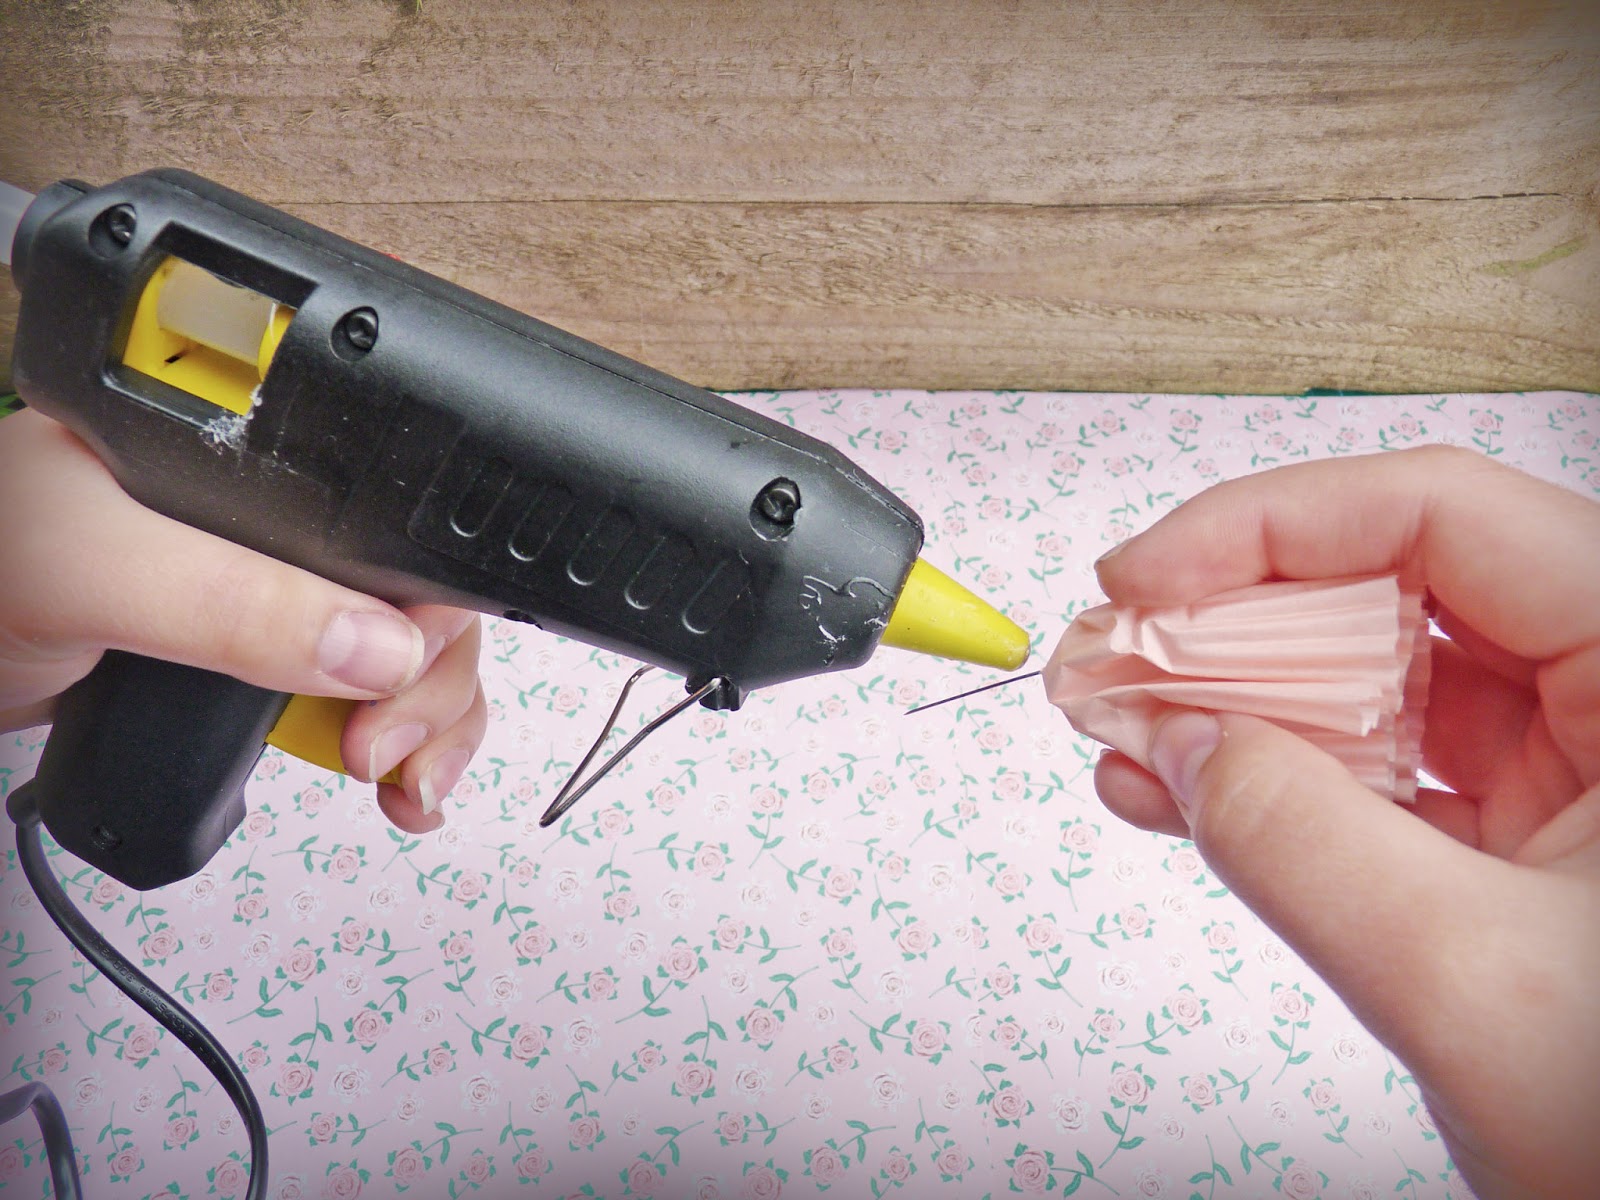
 

 There is no set pattern to do this, you can start where ever you like. Just leave a couple of centimetres in between each pin and make sure you space them out. Any large gaps can be filled in later if need be! Don't forget to leave a gap at the bottom so you can attach it to the candle stick once you have finished. The decoration can be attached to the candlestick using your glue gun!   


And there you have it! A simple, yet beautiful table decoration that can be used for any occasion such as weddings, vintage tea parties or just around your home.


Monday, 6 May 2013

Vintage doily bowl.

Hello! We're back again with another crafty idea for you lovely people.
This is a nice easy one and has a brilliant outcome. We have been inspired by all things vintage lately and want to share it with you.
We are going to show you how to make easy peasy doily bowls, so get to your grannies house and steal..ahem, ask nicely for her doilies or have a root through some charity shops. We found them nice and cheap in an antique shop.


Here's what you will need!
Doilies, doilies and more doilies.
PVA glue and plenty of it (Fabric stiffener can be used but it's quite expensive. PVA works just as well).
Cling film.
A bowl.


Firstly, make sure your doilies are all nice and clean as you don't want a bowl with a big tea stain on it. (Unless you're going for that look, of course).
Cover your bowl with cling film and put your doily over the top. Then go crazy with the glue! Add a little bit of water to your PVA to make it easier to spread. Don't be shy - slap it on as it will dry clear so don't panic about how much you're putting on!


Wait a few hours until its completely dry! With all this nice weather we are having you can pop it outside and it will be dry in no time!

Once the doily feels solid enough to pull off the bowl, remove the cling film slowly (it should come off fairly easily) and voilĂ  you have a nice vintage doily bowl to fill with goodies!


Monday, 22 April 2013

Hop to it!

Hello, we're back again!

This is part two of our post about spray painting. You can see part one here.

These were our favourite items to make and we think they deserve their own blog post! They are so simple to do and we think you'll agree the end result is pretty brilliant!


Where you can find these items:

Spray paint: Wilkinsons
Rabbits: Schleich (Can be found at Tesco direct)
Jars: Wilkinsons/Morrisons or you could use a recycled glass jar.
Superglue: Any craft/DIY shop or supermarkets. 


Once you have decided which bunny you would like on each jar, carefully apply plenty of superglue to the bottom of each figure. Leave it to dry for at least an hour as you don't want it to come off as soon as you spray it! 

The next step is the fun part! Unscrew and set the jars aside. Time to go crazy with your spray paint, any colour you want. Read our last blog post for top tips on spraying. 

And it's as simple as that!


Don't they look great! Use them to store anything from sweets to keeping your crafty bits organised! They make great gifts, without all the hassle! We love them! 

Don't forget to send us your photos if you give it a try! Email us at info@belleandblue.co.uk and we may feature them on our Facebook!


Thursday, 18 April 2013

Spray, spray, spray #1

Got that "lovely" ornament that your Aunt Mildred got you as a wedding gift that just doesn't suit your decor. Has it been stuck at the back of a cupboard or shoved in a box collecting dust? 
We love giving out dated items an inexpensive makeover and it's so simple! All you need is your favourite colour spray paint and a nice dry day. Which does come along every now and then (just don't blink or you'll miss it).
We have this lovely owl ornament that was found in the attic. Nobody has any idea where it came from so we claimed it for ourselves! Top tip: Have a good look in charity shops and at boot sales for a great item to spray!


We have gone for white spray paint to give it a modern look as white decor is very on trend at the moment.


Try not to go crazy with your spray paint, just do a thin coat at a time and let it dry. Remember - less is more and you can add more layers as you go along! Patience is the key to avoid smudges and finger prints!

As we said before, it is quite difficult to get a warm day in this country but it will work much better if you can wait for the sun to come out. Cold weather can cause the paint to dry a bit dull and we don't want that! We want a fresh and modern look!

You can spray just about any old item any colour you want!

Important note: Make sure you're not spraying an antique worth a lot of cash. Cause that would be very silly!

Try spraying glass bottles and using them as vases, very shabby chic!


You could also create colourful book ends with old plastic toys. Superglue them to a block of wood and spray them up! They look great in kids room and you can use dinosaurs for boys or horses for girls! You could also get two matching ornaments for a more grown up modern look! Genius!

Picture taken from styleathome.com
Picture taken from justcraftyenough.com


Tuesday, 12 March 2013

Do it yourself.

We love DIY and getting crafty here at Belle and Blue. Which is why we'll be posting to give you all some crafty inspiration! We'll shortly be showing you everything from home and wedding crafts to baking! 

Keep your eyes peeled for our first crafty blog. Hint - It involves getting creative with spray paint!

How exciting! 


In the meantime, check out this crafty pig! Messy!